Sealing vinyl decals or designs on wood is an important step to protect both the vinyl and the wood surface, ensuring the longevity of the decoration. When you’ve applied a vinyl design to a wooden object, a sealant can help prevent peeling, protect against wear, and make the surface easier to clean. Here’s what you can use to seal vinyl on wood effectively:
4 Vinyl Sealing options on Wood
1. Polyurethane
- Type: Both water-based and oil-based polyurethane can be used, but water-based polyurethane is preferred for its clearer finish and less tendency to yellow over time.
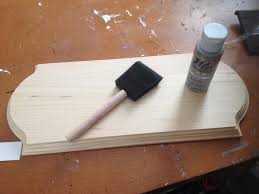
- Application: Apply with a soft-bristle brush, foam brush, or a water-based spray. Avoid excessive brushing or rebrushing to prevent the vinyl from lifting.
2. Polycrylic
- Type: This is a water-based protective coat that is less likely to yellow than oil-based options, making it ideal for lighter wood finishes or white vinyl.
- Application: Apply with a fine-bristle brush or a foam brush in thin, even coats. It dries quickly, so work efficiently to avoid brush marks.
3. Acrylic Sealer (Spray)
- Type: Acrylic sealers come in spray cans and are very user-friendly. They provide a durable, clear coating that can protect the vinyl and wood.
- Application: Spray in a well-ventilated area, applying thin, even coats. Allow adequate drying time between coats as recommended by the manufacturer.
4. Epoxy Resin
- Type: Epoxy resin provides a thick, glossy coating that can encapsulate the vinyl completely, offering excellent protection.
- Application: More involved, requires mixing two components (resin and hardener) before application. Pour or brush on the surface, ensuring coverage over the vinyl. Epoxy resin is self-leveling but needs a dust-free environment to cure without imperfections.
How to seal vinyl on wood food safe
Sealing vinyl on wood for food-safe applications involves a few key steps to ensure that the surface is not only durable but also safe for contact with food. Here’s a general guide to achieve this:
- Choose the Right Vinyl: Make sure the vinyl you’re using is suitable for your project and is of high quality to ensure durability and longevity.
- Prepare the Wood Surface: The wood surface should be clean, dry, and smooth. Sand the wood with fine-grit sandpaper to remove any rough spots or imperfections, and then wipe it down with a damp cloth to remove dust.
- Apply the Vinyl: Carefully apply the vinyl to the wood surface, smoothing out any bubbles or wrinkles. Use a squeegee or a credit card to help adhere the vinyl firmly to the wood.
- Select a Food-Safe Sealant: This is the most crucial step for making the project food-safe. Look for a sealant that is specifically labeled as food safe. These products are designed to not leach chemicals into food and are safe for contact with edibles. Common food-safe finishes include certain mineral oils, beeswax, and some water-based polyurethanes.
- Apply the Sealant: Follow the manufacturer’s instructions for applying the sealant. Typically, you’ll apply it with a clean brush or cloth, wait for it to dry, and then apply additional coats as recommended. Be sure to cover the entire surface, including the edges, to ensure a complete seal.
- Cure Time: Allow the sealant to fully cure according to the manufacturer’s instructions. This can vary but often takes several days. The sealant needs to be fully cured to be truly food safe.
- Maintenance: Keep in mind that the wood surface, even when sealed, may require maintenance over time, including reapplication of the sealant to keep it food safe and to maintain its appearance.
It’s important to note that not all sealants are suitable for all types of food contact. For instance, some are only safe for incidental contact and not for surfaces where food will be cut or prepared directly. Always check the product labels and safety data sheets of the materials you’re using to ensure they meet your specific needs for food safety and durability.
Lastly, consider consulting with a professional or the manufacturer if you’re unsure about the suitability of a product for your project, especially when it involves food safety.
How to seal vinyl using Mod Podge
Sealing vinyl with Mod Podge can be an effective way to protect your design and ensure it adheres well to various surfaces, including wood, fabric, and more. Here’s how to do it:
1. Prepare Your Surface
- Clean: Make sure the surface where you’re applying the vinyl is clean and free of dust, grease, or any other debris. If you’re working with wood, sand it down smoothly and wipe off any sawdust.
- Apply Vinyl: Carefully place your vinyl onto the surface. Use a scraper or a credit card to smooth out any bubbles and ensure good adhesion.
2. Apply Mod Podge
- Choose the Right Formula: Mod Podge comes in various formulas, including Matte, Gloss, and Dishwasher Safe versions. Choose the one that best suits your project’s needs. For items that need to be washed or will be exposed to moisture, the Dishwasher Safe formula might be the best choice.
- Test First: If you’re unsure about how the Mod Podge will react with your vinyl or surface, do a small test on a similar material or an inconspicuous area.
- Brush It On: Use a soft bristle brush to apply a thin layer of Mod Podge over the vinyl and the surrounding area. Work in one direction to minimize brush strokes. Avoid applying too much pressure or too thick a layer, as this can cause the vinyl to peel.
- Let It Dry: Allow the Mod Podge to dry completely, which typically takes about 20-30 minutes, but refer to the product instructions for specific drying times. The surface will look clear once it’s dry.
3. Apply Additional Coats
- Add Layers for Durability: For extra protection, you can apply 2-3 additional coats of Mod Podge. Make sure each layer is completely dry before applying the next. Waiting times can vary based on humidity and thickness of application.
- Smooth It Out: If you notice any brush strokes or bumps after it dries, you can lightly sand the surface with very fine-grit sandpaper and then wipe it clean before applying another coat.
4. Curing
- Cure Time: Follow the Mod Podge instructions for curing times. Some formulas require 28 days to cure fully, especially if you’re using the Dishwasher Safe version. Read about 13 tips to make flex seal dry faster.
- Use Carefully: Even though it might feel dry to the touch, it’s important to wait until the Mod Podge has fully cured before using the item heavily or washing it. Avoid wet seal.
5. Maintenance and Care
- Cleaning: Clean the surface gently with a damp cloth. If you’ve used the Dishwasher Safe Mod Podge, you can wash the item in the dishwasher, but only after it has fully cured.
How to seal permanent vinyl on plastic
Sealing permanent vinyl on plastic requires careful preparation and application to ensure longevity and durability. Here’s a step-by-step guide to help you effectively seal permanent vinyl on plastic surfaces:
1. Select the Right Vinyl
- Ensure you’re using permanent vinyl, which is designed to withstand outdoor conditions and more durable than removable vinyl.
2. Prepare the Plastic Surface
- Clean Thoroughly: Use rubbing alcohol or a mild detergent to clean the plastic surface. Ensure it’s completely dry before applying the vinyl. This step is crucial for removing any oils, dirt, or residues that might prevent the vinyl from adhering properly.
3. Apply the Vinyl
- Position Carefully: Place the vinyl on the plastic surface. Use a squeegee or a credit card to smooth out any bubbles and make sure the vinyl adheres well to the plastic.
- Apply Pressure: After placing the vinyl, press down firmly over the entire design with your squeegee or card. This helps in strengthening the bond between the vinyl and the plastic surface.
4. Sealing the Vinyl
- Select a Sealant: Choose a sealant that’s compatible with both the plastic material and the vinyl. Clear acrylic sealer (spray or brush-on) is commonly used for this purpose. Make sure the sealer is appropriate for the type of plastic and the conditions the item will be exposed to (e.g., outdoor, high-touch areas).
- Test First: If possible, test the sealer on a small, inconspicuous area of the plastic to ensure it doesn’t react negatively with the material.
- Apply Sealant: Follow the manufacturer’s instructions for applying the sealant. If using a spray, hold the can several inches away from the surface and apply a light, even coat. For brush-on sealers, apply with a soft brush in thin, even layers.
- Dry and Cure: Allow the sealant to dry completely. Avoid touching or moving the item until the sealer has cured, as per the product’s instructions. This could take anywhere from a few hours to a day or more, depending on the sealer.
5. Additional Tips
- Multiple Coats: For added durability, consider applying multiple thin coats of sealant, allowing each coat to dry thoroughly before applying the next.
- Curing Time: Respect the full curing time recommended by the sealant manufacturer before using or handling the item. Full curing is essential for achieving maximum durability and protection.
- Environmental Factors: Consider the environment in which the item will be used. Some sealants offer UV protection, which is beneficial for items exposed to sunlight.
6. Maintenance
- Careful Handling: Even with a sealant, it’s best to handle the item carefully to prevent scratches or wear that could damage the vinyl or sealant.
- Cleaning: Clean the item gently with a soft, damp cloth. Avoid harsh chemicals or abrasives that could damage the sealant or vinyl.
By following these steps and choosing the right materials for your project, you can effectively seal permanent vinyl on plastic, ensuring it remains durable and well-protected against wear and environmental factors.
Applying Viny Seal on Different non-wood surfaces:
How to seal permanent vinyl on ceramic
To seal permanent vinyl on ceramic, start by ensuring the ceramic surface is clean and completely dry; use rubbing alcohol to wipe it down for optimal adhesion. Carefully apply your permanent vinyl design to the ceramic, smoothing out any bubbles or wrinkles with a squeegee or credit card for a secure bond. To seal the vinyl, choose a clear, water-based sealer that’s compatible with ceramic surfaces, such as a dishwasher-safe Mod Podge or a clear acrylic spray sealer designed for craft projects.
Apply the sealer evenly over the vinyl and the surrounding ceramic area, following the product’s instructions for drying and curing times. It’s crucial to apply thin, even coats, allowing sufficient drying time between applications if multiple coats are necessary. This sealing process not only protects the vinyl but also ensures that your decorated ceramic item can withstand handling, washing, and everyday use, maintaining the vibrancy and integrity of the design.
How to seal permanent vinyl on glass
To seal permanent vinyl on glass, begin by thoroughly cleaning the glass surface with rubbing alcohol or glass cleaner to ensure it’s free of dust, grease, and fingerprints, which allows for optimal vinyl adhesion. Carefully place your permanent vinyl design onto the glass, using a squeegee or a flat, rigid card to smooth out any air bubbles and secure the vinyl firmly to the surface.
Although permanent vinyl adheres well to glass and may not always require an additional sealant for indoor use, for extra durability or outdoor applications, consider applying a thin layer of a clear, water-based sealant, such as a spray acrylic sealer or dishwasher-safe Mod Podge.
Spray the sealant in light coats, holding the can a few inches away from the surface, or apply the Mod Podge with a soft brush, ensuring even coverage over the vinyl and the surrounding area. Allow the sealant to dry completely according to the manufacturer’s instructions, applying additional coats if necessary for increased protection. This process enhances the longevity of the vinyl design, protecting it from peeling, water damage, and UV exposure, while maintaining the clarity and beauty of the glass.
Tips and Warnings
- Avoid Heat: High temperatures can soften Mod Podge, so it’s best to keep sealed items away from heat sources.
- Longevity: While Mod Podge can effectively seal vinyl, it may not be as durable as some other sealants for heavy-use items. Consider your project’s intended use when choosing your materials.
Mod Podge is a versatile sealant, but it’s important to consider the specific needs of your project, including durability, exposure to elements, and whether it will come into contact with food. For food-related projects, ensure the Mod Podge formula used is non-toxic and appropriate for such use.
Preparation and Tips for Application:
- Surface Preparation: Ensure the wood surface and vinyl are clean and free from dust or oils. The wood should be sanded smoothly if not already finished, and any previously applied finish should be dry.
- Test First: Always test the sealant on a small, inconspicuous area or a scrap piece of vinyl and wood to ensure compatibility and that it doesn’t damage or discolor the vinyl.
- Application Conditions: Follow the manufacturer’s instructions regarding temperature and humidity conditions for application to ensure the best finish.
- Curing Time: Allow the sealant to cure fully before handling or using the wood item. Curing times can vary significantly based on the product and environmental conditions.
Sealing vinyl on wood not only protects your work but also enhances the overall appearance of the finished project. Choosing the right sealant and applying it properly will ensure that the vinyl adheres well to the wood and remains protected against wear, moisture, and other environmental factors.