Looking for the best way to caulk your windows?
For over a decade, I’ve specialized in making homes more energy-efficient and comfortable, focusing particularly on the critical but often overlooked task of window caulking. Through years of hands-on experience, I’ve refined techniques that not only ensure a tight seal against the elements but also enhance the aesthetic appeal of any home.
In this guide, I’m excited to share with you the knowledge and insights I’ve acquired, guiding you step by step through the process of caulking your windows. Whether you’re a novice DIY enthusiast or someone familiar with home maintenance, the advice and tips offered here will empower you to undertake window sealing projects with confidence, ensuring optimal performance and longevity.
What is caulking windows and benefits:
Caulking windows is the process of sealing gaps and cracks around window frames and between the window and the building structure with a flexible sealing compound, known as caulk. This process is crucial for several reasons:
- Energy Efficiency: By sealing the gaps around windows, caulking helps prevent air leakage. This keeps warm air inside during the winter and cool air in during the summer, reducing heating and cooling costs and improving the overall energy efficiency of a building. Some estimates indicate that you can save 7 to 8% of energy bills by caulking windows.
- Waterproofing: Caulking prevents water from entering through gaps around windows, protecting the interior of the building from water damage, mold, and mildew growth.
- Noise Reduction: Sealing gaps with caulk can also help reduce noise transmission from outside, leading to a quieter indoor environment.
- Pest Deterrence: Properly sealed windows can deter pests and insects from entering the home through small openings.
- Aesthetics: Caulking provides a neat, finished look to window installations by filling in gaps and creating smooth transitions between different materials.
The process typically involves cleaning the area to be caulked, removing any old caulk or debris, applying the caulk with a caulking gun, and then smoothing it out to ensure a tight, even seal. Choosing the right type of caulk is important, as different materials (such as silicone, acrylic latex, polyurethane foam, and butyl rubber) offer varying properties suited to different conditions and needs.
What happens when you don’t caulk your windows:
When a window is not caulked properly or at all, several issues can arise, affecting both the comfort and the energy efficiency of your home, as well as potentially leading to more serious damage over time. Here are some of the primary consequences:
1. Increased Energy Bills
Without proper caulking, windows can become significant sources of air leakage. This means warm air can escape during the winter, and cool air can leak out during the summer, forcing your heating and cooling systems to work harder to maintain comfortable indoor temperatures. As a result, you may see a noticeable increase in your energy bills.
2. Drafts and Discomfort
Gaps around windows without adequate caulking can lead to drafts, making areas near windows uncomfortable to be around, especially during cold weather. This can reduce the overall comfort level of your home’s living spaces.
3. Moisture and Water Damage
Uncaulked windows can allow water to seep into your home during rain or snow, which can lead to water damage on window sills, walls, and floors. Over time, this moisture can contribute to the growth of mold and mildew, which can have health implications and lead to costly repairs.
4. Pest Intrusions
Gaps around windows can also serve as entry points for pests such as insects and small rodents. Once inside, these pests can become a nuisance and potentially cause damage or pose health risks.
5. Decreased Home Value
Over time, the issues arising from uncaulked windows, such as damage and inefficiency, can affect the overall value of your home. Potential homebuyers may view the lack of proper maintenance as a sign of neglect, which could impact the sale price or the appeal of your home on the market.
6. Noise Pollution
Caulking helps to seal windows not only against air and moisture but also against noise. Without proper caulking, windows can allow more outside noise to penetrate your home, reducing the tranquility of your living environment.
What are the 4 types of window caulks?
When it comes to caulking windows, choosing the right type of caulk is crucial for ensuring a durable and effective seal. There are four primary types of caulk commonly used for windows, each with its specific properties and applications:
1. Silicone Caulk
- Properties: Silicone caulk is waterproof, flexible, and resistant to temperature changes. It adheres well to most surfaces, including glass, metal, and plastic.
- Applications: Ideal for exterior window sealing due to its durability and resistance to weather conditions. It can also be used in areas with high moisture, such as bathrooms.
2. Acrylic Latex Caulk (Painter’s Caulk)
- Properties: Acrylic latex caulk is easy to apply and clean up with water. It can be painted over, making it a good choice for interior projects where aesthetics are a concern.
- Applications: Best suited for sealing gaps and cracks in interior window frames and trim. Not as durable or flexible as silicone, so it’s less suitable for exterior use.
3. Polyurethane Foam
- Properties: This type of caulk comes in a spray foam form and expands to fill larger gaps and voids. It offers excellent insulation properties and is very durable.
- Applications: Polyurethane foam is often used for insulating around windows and sealing large gaps where traditional caulk lines would not be effective. It requires more precision in application due to its expanding nature.
4. Butyl Rubber Caulk
- Properties: Butyl rubber caulk has excellent adhesion and is particularly effective in sealing joints that are subject to movement. It’s waterproof and durable, making it suitable for outdoor use.
- Applications: This caulk is often used for sealing around exterior windows, in roofing applications, and in areas where a waterproof seal is critical. It’s tougher to apply and clean up than silicone or acrylic latex caulk.
Choosing the Right Caulk
When selecting caulk for window projects, consider the specific needs of the application, such as whether the caulk needs to be paintable, how much movement the sealed area will experience, and exposure to weather elements. Silicone and polyurethane are generally preferred for their durability and flexibility, making them excellent choices for exterior window sealing. Acrylic latex caulk, on the other hand, is more suitable for interior applications where ease of use and the ability to paint over the caulk are important. Butyl rubber caulk is a good choice for projects requiring a strong, waterproof seal.
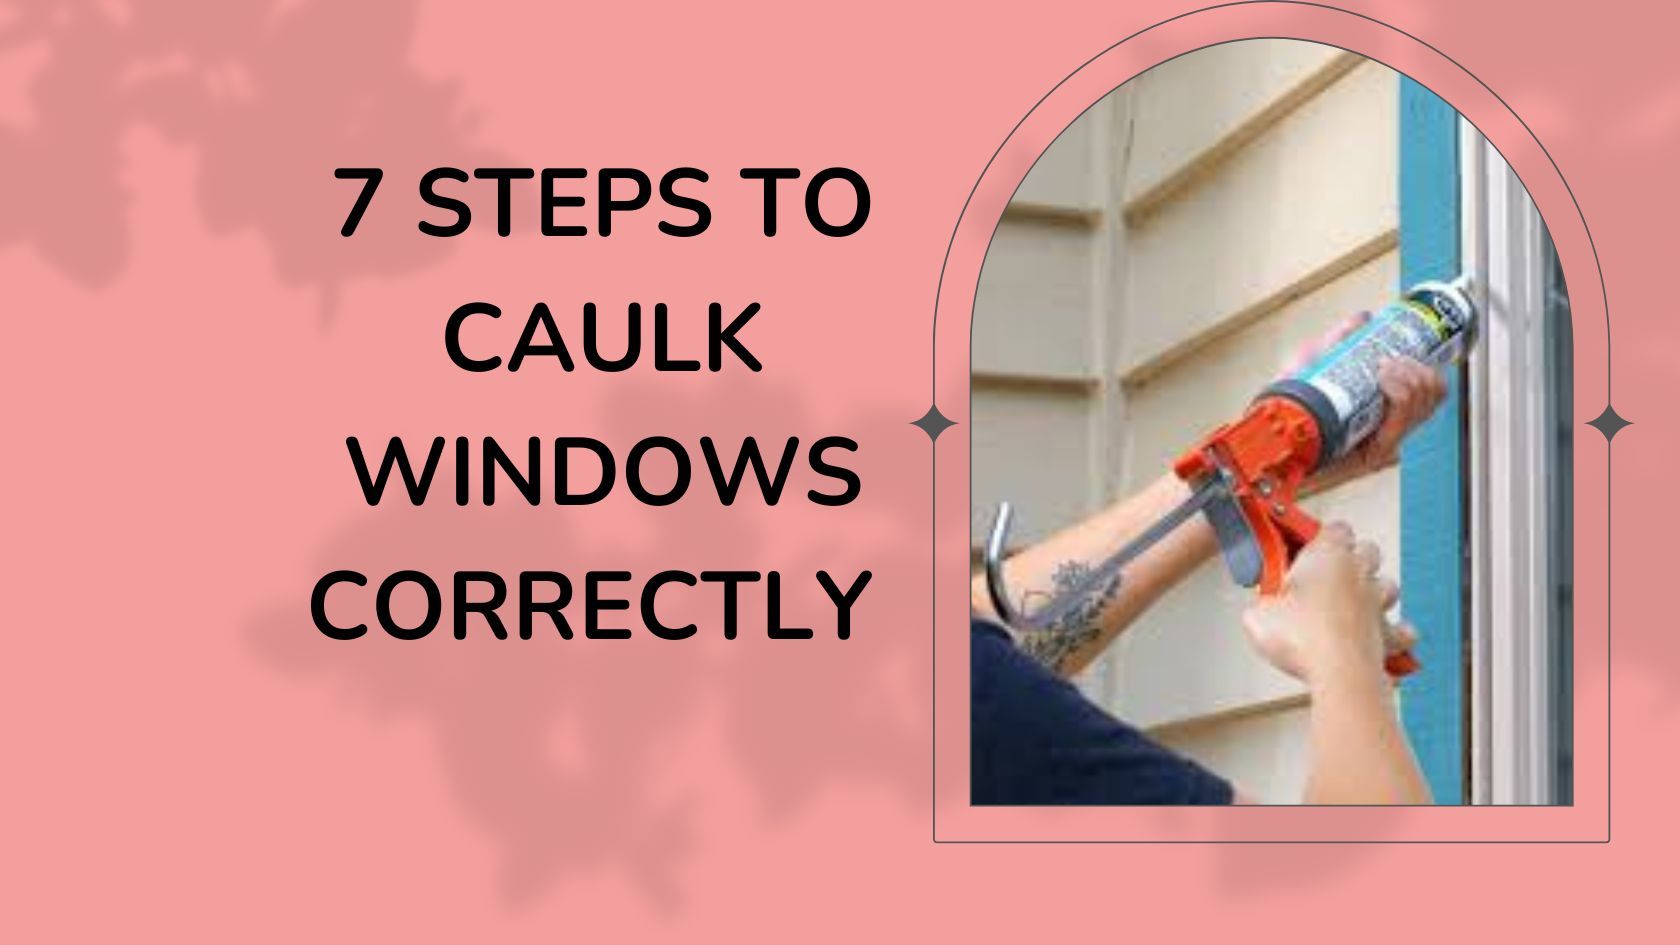
Steps to caulk your windows:
Caulking windows is an essential maintenance task that helps to seal air leaks and improve energy efficiency in your home. Here’s a detailed guide on how to caulk windows effectively:
1. Gather Your Materials
- Caulk: Choose a high-quality, weather-resistant caulk suitable for window exteriors. Silicone or polyurethane caulk is preferred for its durability and flexibility.
- Caulking Gun: This tool is used to apply caulk smoothly.
- Putty Knife or Caulk Removal Tool: To remove old caulk.
- Cleaning Supplies: A cloth, soap, water, and possibly rubbing alcohol or a mild solvent.
- Masking Tape: To line the edges for a clean, straight finish.
- Utility Knife: If you need to open the caulk tube or trim excess caulk.
2. Prepare the Area
- Remove Old Caulk: Use the putty knife or caulk removal tool to scrape away any old caulk. Be thorough but careful not to damage the window frame or wall.
- Clean the Surface: The area must be free of dirt, grease, and old paint. Wash with soapy water and dry thoroughly. For stubborn residue, rubbing alcohol or a mild solvent can be used.
- Tape the Edges: Apply masking tape to both sides of the seam where you will apply caulk, leaving a gap the width you want the caulk bead to be. This helps achieve a straight, professional-looking line.
3. Prepare the Caulk and Caulking Gun
- Cut the Caulk Tube: Use the utility knife to cut the tip of the caulk tube at a 45-degree angle. The size of the hole will determine the size of the caulk bead. A smaller hole is generally better for more control.
- Load the Caulking Gun: Insert the caulk tube into the caulking gun, with the nozzle in the front. Press the trigger a few times until the caulk is primed and begins to emerge from the nozzle.
4. Apply the Caulk
- Hold the Gun at a 45-Degree Angle: This angle allows for a smooth application of caulk into the gap.
- Apply Consistent Pressure: Start at one corner and squeeze the trigger consistently as you move along the seam. Keep the speed steady for an even bead.
- Smooth the Caulk: Use a caulk smoothing tool or your finger (wet it slightly with soapy water for ease of smoothing) to press the caulk into the gap and smooth the surface.
5. Finishing Touches
- Remove the Tape: Carefully pull away the masking tape while the caulk is still wet, leaving a clean, straight line.
- Let It Dry: Refer to the caulk’s instructions for drying times before touching the area or exposing it to moisture.
6. Cleanup
- Clean Tools Immediately: Use soapy water or a solvent (as recommended for the type of caulk you used) to clean your tools.
- Dispose of Excess Caulk Properly: Follow local regulations for disposal of the caulk tube and any excess caulk.
Additional Tips
- Check weather conditions before starting; it’s best to caulk on a dry day with moderate temperatures.
- Practice applying caulk on a piece of cardboard if you’re unfamiliar with using a caulking gun.
- Inspect your work and the condition of the caulk annually to ensure there are no gaps or deterioration.
By following these steps, you can effectively seal your windows, improving the energy efficiency and comfort of your home.
7 Areas to avoid when caulking windows:
When caulking windows, it’s important to apply the sealant in a way that enhances the window’s performance without causing unintended issues. Here are some areas and practices to avoid when caulking windows:
1. Weep Holes
- Avoid caulking weep holes: These are designed to drain water away from the window. Sealing them can trap water, leading to moisture problems and damage.
2. Moving Parts and Tracks
- Avoid caulking moving parts and tracks: Caulk should not be applied to parts of the window that are meant to move, such as the tracks for sliding windows. This can hinder the operation of the window.
3. Between Window Panes
- Avoid applying caulk between window panes: On double or triple-glazed windows, caulking between the panes can interfere with the window’s designed thermal properties and potentially damage the seals.
4. Over Old, Uncleaned Caulk
- Avoid caulking over old, uncleaned caulk: Always remove old caulk and clean the area thoroughly before applying new caulk to ensure proper adhesion and seal.
5. Completely Sealing the Exterior Perimeter
- Avoid completely sealing the exterior perimeter without assessing moisture escape routes: Ensure that any moisture that does get behind the window frame has a way to escape or evaporate, to prevent rot and mold.
6. Ventilation Areas
- Avoid sealing areas meant for ventilation: Some windows may have intentional gaps designed for ventilation; sealing these could lead to poor air quality or moisture issues inside.
7. Directly on Window Surfaces
- Avoid applying caulk directly on the surface of the window glass: Caulk is meant to seal gaps between the frame and the building structure, not to adhere to the glass itself, as this can affect visibility and aesthetics.
Tips for Effective Caulking
- Identify the right areas: Focus on gaps and openings around the window frame where air and water might penetrate.
- Choose the right caulk: Use a caulk suitable for your window material and the environmental conditions it will face.
- Prepare the surface: Clean and dry the area thoroughly for the best adhesion.
- Apply caulk properly: Use a steady hand and caulking gun to apply caulk smoothly and evenly.
- Smooth out the caulk: Use a tool or your finger (covered with a disposable glove) to smooth the caulk bead for a clean, finished appearance.
By avoiding these areas and practices, you can ensure that your caulking job improves the window’s performance and longevity without causing additional problems.
What is the cost of caulking windows?
When it comes to sealing windows to enhance energy efficiency and prevent leaks, homeowners can anticipate a wide range of costs, largely dependent on window size and type. Experts in the field suggest that for a typical double-hung window, the investment for professional caulking services averages around $50.
However, for larger windows such as bay, picture, or other specialty designs, the cost can increase to between $75 and $85 per window. Overall, the expenses to seal a window will vary, falling somewhere between $30 and $100 per seal. This pricing reflects not only the materials required but also the expertise and labor involved in ensuring a high-quality seal that stands the test of time.
Replace my windows with energy-efficient windows
According to Angi, the price range for materials and installation of energy-efficient windows is $320 to $2,000. Upgrading to new windows might be the optimal choice under certain conditions, such as if your current windows are over two decades old, consist of single-pane glass, or are framed with aluminum or uninsulated vinyl. Additionally, if the window frames exhibit signs of rot or water damage, considering new windows could be beneficial for long-term efficiency and structural integrity.
Deciding whether to caulk your existing windows or invest in new energy-efficient windows involves weighing the costs, benefits, and your home’s specific needs. Here’s a comparison to help you make an informed decision:
Caulking Existing Windows
Pros:
- Cost-Effective: Caulking is a relatively inexpensive DIY project, with costs for materials typically low. Even hiring a professional for caulking will be much cheaper than replacing windows.
- Energy Savings: Properly sealing gaps and leaks can significantly improve energy efficiency by reducing drafts and air leaks, though not to the same extent as installing new energy-efficient windows.
- Quick Fix: It’s a faster solution to improving energy efficiency without the disruption of window replacement.
Cons:
- Temporary Solution: Caulking and sealing are maintenance tasks that will need to be repeated over time, as caulk can degrade, shrink, or crack.
- Limited Improvement: While caulking improves energy efficiency, it doesn’t offer the same level of insulation, noise reduction, or UV protection as modern energy-efficient windows.
Installing Energy-Efficient Windows
Pros:
- Significant Energy Savings: Energy-efficient windows are designed to provide superior insulation, reducing your heating and cooling costs more significantly than caulking alone.
- Increased Home Value: Upgrading to high-quality windows can increase your home’s value and appeal to potential buyers.
- Improved Comfort: These windows reduce drafts, filter out UV rays that can fade furnishings, and can decrease outside noise, enhancing comfort indoors.
- Long-Term Solution: Once installed, energy-efficient windows require less maintenance than older windows and remain effective for many years.
Cons:
- High Initial Cost: The main drawback is the cost. Replacing windows with energy-efficient models can be a significant investment, ranging from a few hundred to over a thousand dollars per window, depending on materials, styles, and installation costs.
- Installation Disruption: The process of replacing windows can be disruptive, requiring some construction and potentially altering the appearance of your home.
Considerations
- Age and Condition of Current Windows: If your windows are old, single-paned, or in poor condition, replacing them with energy-efficient models might be more cost-effective in the long run.
- Climate: In areas with extreme weather conditions, the benefits of energy-efficient windows in terms of comfort and energy savings can be more pronounced.
- Budget and Long-Term Plans: If you plan to stay in your home for many years, investing in energy-efficient windows might make more sense financially over time.
Conclusion
If your current windows are generally in good condition and you’re looking for a cost-effective way to improve energy efficiency, caulking and weatherstripping might be sufficient. However, for significant energy savings, increased comfort, and added home value, especially in the long term, investing in energy-efficient windows could be the better choice. Consider your budget, the age and condition of your current windows, and how long you plan to stay in your home when making your decision.
Caulking options to consider depending on budget:
The cost of caulking windows can vary widely based on several factors, including the number of windows, the condition of the windows, the type of caulk used, whether you’re doing it yourself or hiring a professional, and regional labor costs if you’re hiring someone. Here’s a general breakdown to give you an idea of the costs involved:
DIY Caulking
If you decide to caulk your windows yourself, the primary expense will be the materials, including the caulk and any tools you might need.
- Caulk: A tube of high-quality window caulk typically costs between $5 and $10, depending on the type (silicone, acrylic, polyurethane, etc.). Specialty caulks may cost more.
- Tools: If you don’t already have them, you might need to buy a caulking gun (around $10 to $20), a putty knife or caulk removal tool ($5 to $15), and possibly masking tape ($3 to $5).
For a small to medium project, you might spend around $20 to $50 on materials if you’re starting from scratch.
Professional Caulking
Hiring a professional to caulk your windows will be more expensive due to labor costs. Prices can vary greatly depending on your location, the complexity of the job, and the condition of your windows.
- Labor Costs: Professionals might charge by the window, by linear foot, or by the hour. Prices can range from $30 to $70 per window or $1 to $2.50 per linear foot. Hourly rates can vary from $40 to $100, depending on the professional’s experience and your location.
- Additional Costs: If there’s significant prep work involved, such as removing old caulk or repairing damaged window frames, this can increase the total cost.
For a whole-house window caulking project, the total cost can range from a few hundred dollars to over a thousand, depending on the number of windows and the scope of the work required.
Cost-Effectiveness
While the initial outlay for caulking windows, especially if hiring professionals, may seem high, it’s important to consider the long-term savings. Properly sealed windows can significantly reduce heating and cooling costs by improving energy efficiency, making the investment worthwhile over time.
Getting Quotes
If you decide to hire a professional, it’s a good idea to get multiple quotes to compare prices and services. Ensure the quotes include all potential costs and ask about the types of materials used to ensure you’re getting quality work that lasts.
Remember, the cheapest option may not always be the best in terms of quality and durability, so consider the professional’s experience and reputation as well.